


Fancy dress is something that gets even the most mature adults excited, so of course your little ones are enthusiastic when Halloween is coming up. When you’re sticking to a budget, though, shop-bought costumes may be something you don’t want to spend on, especially considering how pricey they can be! Thankfully, making your own DIY Halloween costumes is easier than ever. From scary ghosts to majestic mermaids, we’ve narrowed down 3 of the best kids’ DIY Halloween costumes, all for a budget.
Related: Rare Toys That Could Make You A Fortune
A Ghost
Kicking off the list of kids’ DIY Halloween costumes is, of course, the ghost. This one is renowned as one of the easiest DIY costumes, as most of the time it just involves a white sheet. Our version of the ghost takes the traditional approach up a notch, but still involves no sewing.
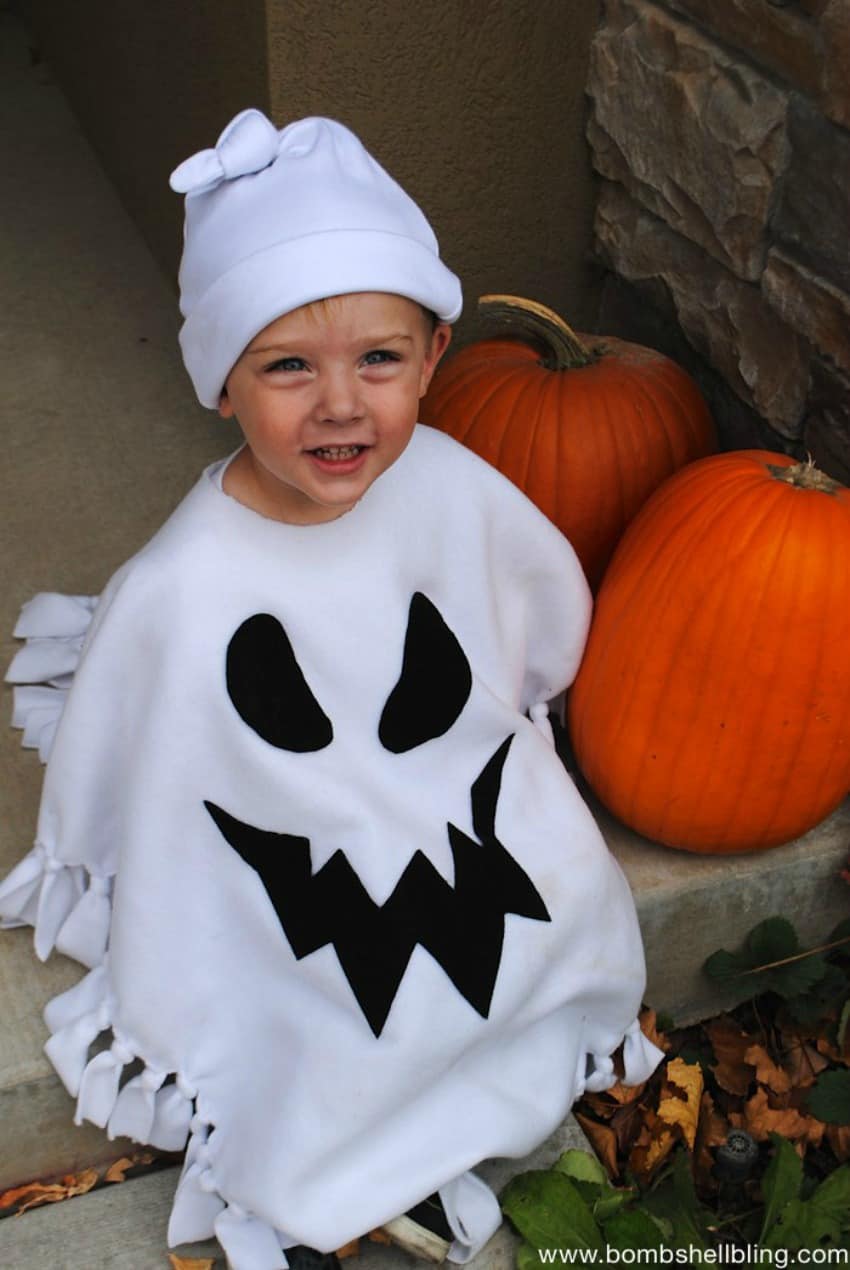
Image courtesy of bombshellbling.com
What you’ll need:
- Two metres of white fleece
- Black felt
- Fabric Glue
- Scissors
How to make:
1. Start by folding the white fleece around your child to measure how much you’ll need, and you want it to end roughly above their ankles. Also, have them reach out their arms so you can measure the width of the fleece to just cover their hands.
2. Lay down the folded piece of fabric and draw half an oval on one side, allowing you to cut a full oval out of the fabric. This will be the overall poncho.
3. Cut a hole in the middle of the oval big enough for your child’s head to go through.
4. Cut uniform strips along the edge of the fabric to act as fringing on the poncho. After this, put a knot into each strip.
5. Finally draw the facial features onto your black felt, after this simply cut them out and glue them onto your poncho and voila!
Related: 4 DIY Gift Ideas To Say Thank You To Your Favourite Teacher
A Mermaid
Channeling your inner Ariel is now easy to do without a visit to the Disney store! This one’s a little more complicated than the ghost costume and you will need to sew a bit, but the results are beautiful!
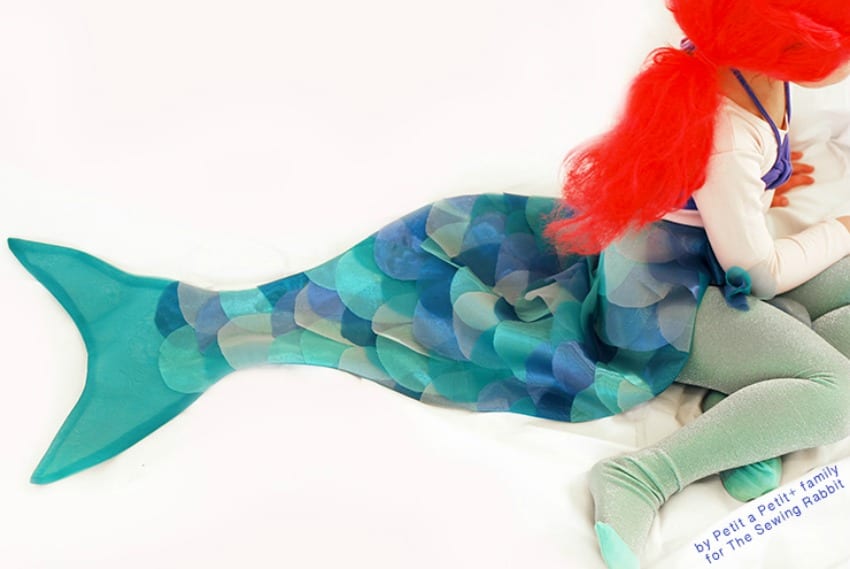
Image courtesy of mesewcrazy.com
What you’ll need:
- Organza in 5 different shades
- Jersey material
- Scissors
- Needle and thread
How to make:
1. Measure from your child’s waist down to the floor and around their waist and chest. Add 4 inches to the waist and 10 inches to the height to get the dimensions of your main piece of fabric. Cut this out of a chosen colour of organza.
2. Fold your main piece of organza in half, trace an outline of a mermaid’s tail and cut so you have two identical pieces.
3. Set aside two thin rectangular pieces of organza that are the same length as your child’s waist is around. These will be used to tie the tail around their back.
4. Cut several other pieces of organza to 20 x 25 inches. Fold each piece in half and in half again until you get a small square of roughly 5 inches. Cut a semi-circle into each piece, and voila! You have scales
5. After this, simply sew your scales onto your tail, starting from the bottom and working your way up. Make sure you overlap your scales and only sew at the top of each scale.
6. Grab the two rectangular ties and sew onto each edge of the tail, near the top. After this, sew your two pieces of tail together.
7. Now it’s time to get on with the bikini top. Cut your child’s chest dimensions out of your jersey fabric. Also, ensure you cut a long thin piece to use as the string on the bikini top. Taking the larger piece, tie a knot in the middle with the string inside to act as a halter neck.
8. Once your costume has been made, add some sparkly tights and an extra top to make your very own little mermaid! See a video with this tutorial here.
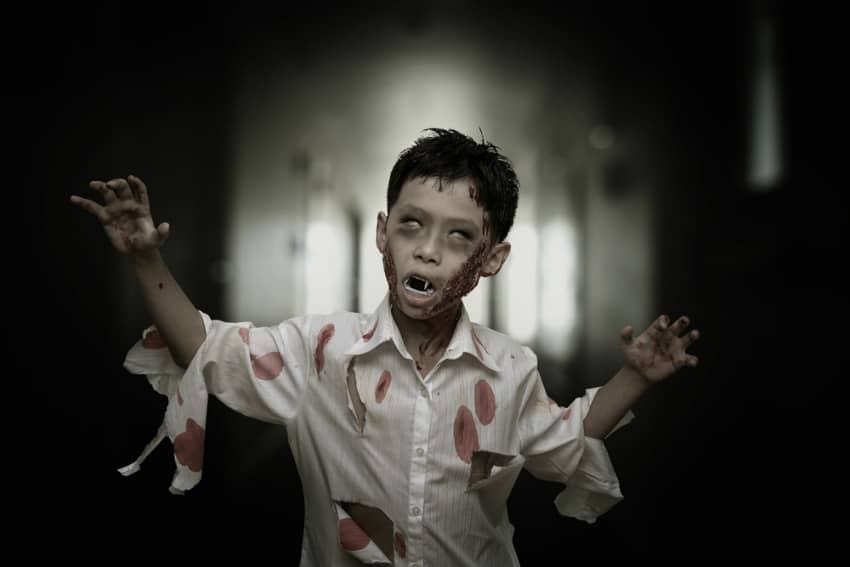
A Zombie
A zombie costume is one of the easiest, as it usually just involves slightly shredded clothes and fake blood. However, if you want to go the extra mile, here’s a DIY zombie costume for a budget.
What you’ll need:
- Existing clothes
- Scissors
- Tea bags
- Fake blood
- Face paint
How to make:
1. Find an outfit you already have and don’t mind cutting up a bit. This is a chance to use old clothes strewn at the back of your child’s wardrobe, or perhaps an old school uniform that’s a little short on the ankles. Lighter coloured clothes work better for this as you can see the blood stains a bit better.
2. Make a cup of black tea and put in a spritz bottle. Use this to lightly spray the clothes to make them look a little aged.
3. Once the clothes are dry, get shredding the clothes with a pair of scissors. Try not to go overboard and cut random areas to make it look a little more realistic.
4. Next, scatter fake blood sparingly over the clothes. At this time you can also add some to your child’s face and arms. If you opt for face paint, you’ll need to paint your child’s face before adding the fake blood. A general white all over with dark circles around the eyes helps give a pale zombie-like complexion.
5. If you want to go the extra mile, add a little dirt to the clothes to get that risen from the dead look… and that’s it!
Happy Halloween! We hope you enjoy your DIY Halloween costumes!