


With Christmas much closer than many of us would care to admit, adults and children across the country are eagerly counting down to December 1st for one reason: Their advent calendar! Advent calendars are a festive childhood favourite that we don’t seem to grow out of. Increasingly grown up versions containing everything from posh chocolates to beauty products to pork scratchings are now available in the shops to cater to all age groups and tastes. These advent calendars can get very expensive, though, with some costing over £100! With a little artistic flair, though, you can create your own DIY advent calendar at home for a fraction of the price. And the best bit? You can fill them with whatever advent goodies you like!
How to make our Rudolph DIY advent calendar
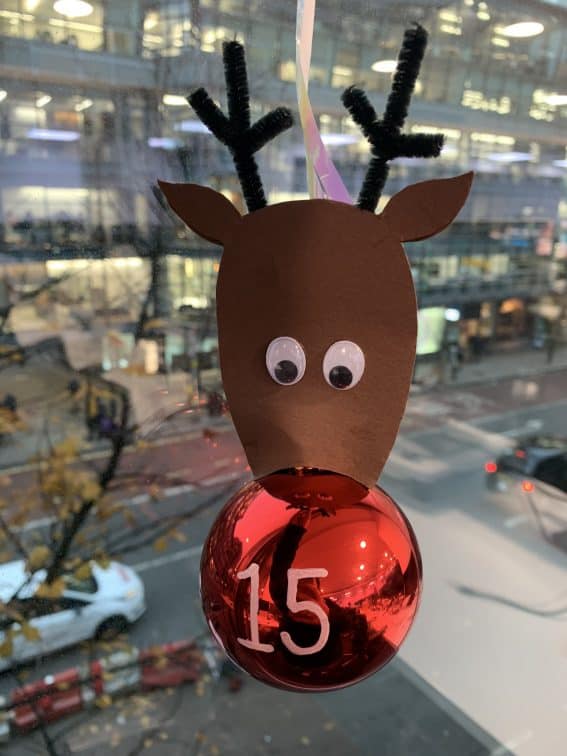
This DIY advent calendar uses clear plastic baubles that come in two parts ready for you to fill and then clip together. These baubles are available in a variety of sizes, making this a perfect option if you need multiple advent calendars, as you can fill each bauble with enough treats for everyone! All you’ll need to worry about is taking it in turns to open each bauble so everyone gets a turn!
What you’ll need
24 clear, fillable baubles like these from Hobbycraft – you’ll need four packs if you go for these
Red spray paint – see if you can find one with a glossy finish!
A white paint marker, or white acrylic paint and a fine paint brush
12 sheets of good quality brown card
24 black or brown pipecleaners
48 googly eyes – enough for 24 Rudolph’s to have two eyes each!
PVA glue
Ribbon or string
A piece of paper
Paper clips
Newspaper
Advent calendar treats!
How to make it
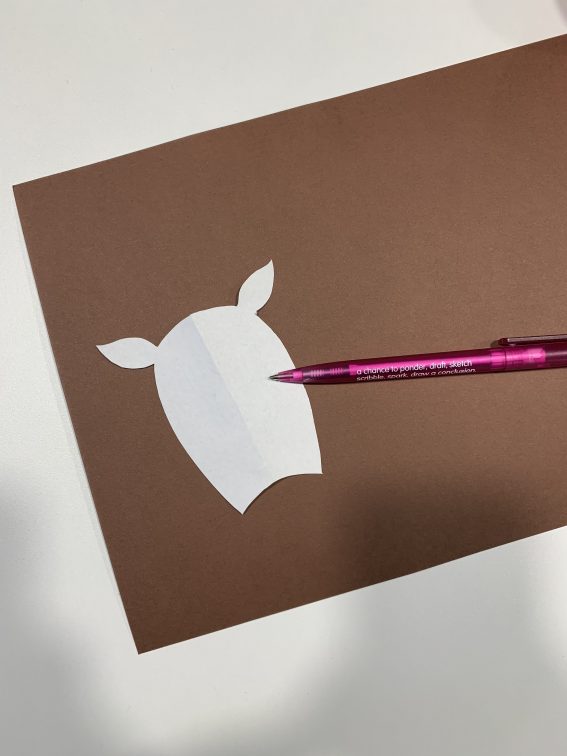
First things first, you need to make a template. Take one of your baubles and split it into two. Place one half on your piece of paper, and draw a pear shape above it, but so that the tip of the pear is underneath the bauble. Where your pear shape and the bauble join, complete the shape by tracing the edge of the bauble to join the two outer lines. This will form Rudolph’s face, with the bauble at the bottom to form the nose. Cut out this outline, and you should have a shape like this:
Next, we’re going to make Rudolph’s nose! Take each of your baubles – including the one you just used to make your template – and split them into their two sections. In a well ventilated area and with plenty of newspaper down, lay out each semi-sphere section, rounded side up (so they stay still). Spray the rounded side of each section with red spray paint, and leave them to dry – this can take up to three hours.
While your noses are drying, you can make the pieces for Rudolph’s face. Taking your template, draw around it on your brown card using a pencil. You’ll need two for each decoration, so fit as many faces onto one sheet of foam as you can. We managed to get four onto a sheet of A4 card. Then cut round each one.
Facial features
Thinking about where Rudolph’s nose will be once each of your DIY advent calendar baubles are assembled, and what kind of look you want for your Rudolphs, stick a pair of googly eyes onto half of the faces you’ve created.
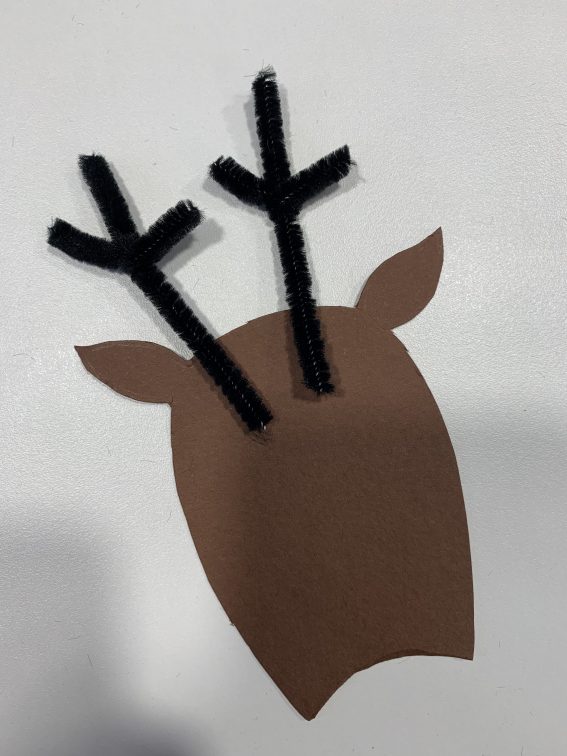
Next cut a pipecleaner into quarters, then take two pieces and wind them together so they look like an antler. Repeat this so that you have enough “antlers” for each of your Rudolphs to have two.
Take a blank face and position the antlers by hand, rejigging them until you’re happy. When you’re sure, dab some PVA glue where you want to secure each antler, then place the antlers on top of the glue and press them down. You may need to weigh down the antlers and faces to make sure they stick properly and don’t fall off later!
While your faces are drying, go back to your baubles. Take the sections which don’t have the triangular section with the hole for you to thread ribbon through, along with your paint marker or white paint and a paintbrush. On each section, paint a number 1-24, making sure your numbers are big enough to read. You may need to do a couple of coats of paint so that it really stands out on the red. Once you’re satisfied, leave these to dry completely.
Finishing touches
Once everything is dry – and we know, it feels like it’s been ages! – it’s time to assemble your Rudolphs! Take the un-numbered sections and thread a good length of ribbon through each one , tying the ends together in a knot. Then, grab a pair of faces and place the antlered side behind the ribbon so that the ribbon is poking up between Rudolph’s antlers. Spread the face around the ribbon with glue, and then place the other half of Rudolph’s face (the half with the eyes) on top, in front of the ribbon. Press together and add paperclips round the edges to keep everything in place until it’s dry. If you’re using liquid glue, dab a small amount on each side of the plastic ribbon loop and press the insides of the faces onto it to make it extra secure.
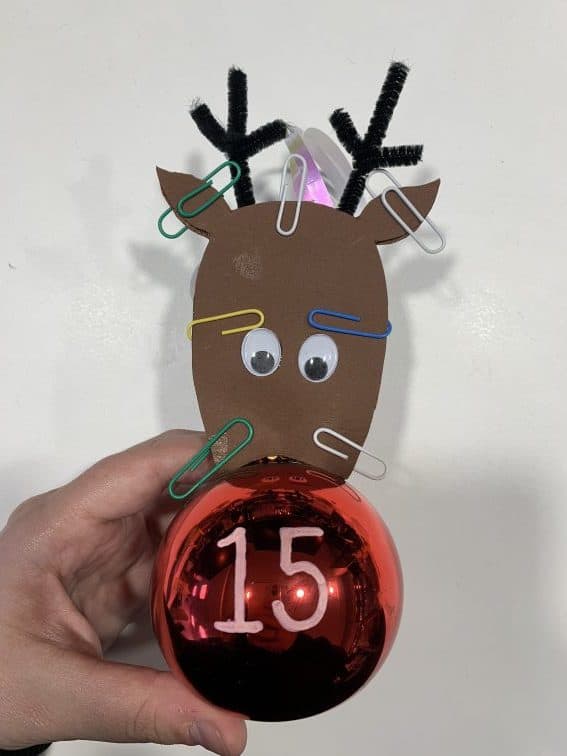
Once each of your faces is stuck to a bauble and is dry, it’s finally time to fill up with treats! Place your desired treats into the face-side of each bauble, and then pop the fronts with the numbers onto each one. Make sure the number faces the right way up! Hang all of your creations around your Christmas tree, and enjoy opening them up each day!