There’s no getting around it – Christmas is an expensive time of year. While the bulk of our budget goes towards gifts and entertaining as you might expect, as a nation we spend a whopping £2.3 billion a year on trees and decorations. With budgets stretched during the festive season, we’ve scoured the web for some of the best-looking DIY Christmas decorations you can easily make at home. You can save some money and fill your home with festive cheer way ahead of the big day. After all, who doesn’t love a bit of festive family crafting?!
Glass Bauble DIY Christmas Decorations
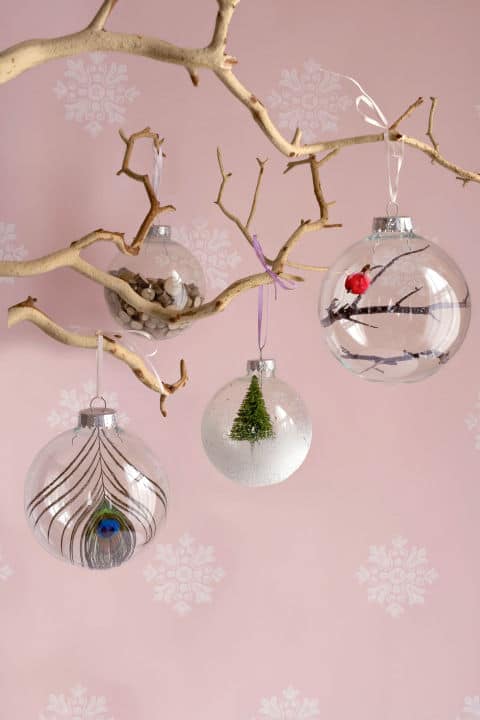
Image courtesy of www.countryliving.com
Whatever your Christmas theme, customising clear glass baubles makes for a great addition to any Christmas tree. Your creations can be as simple or as complicated as you like – try filling a bauble with coloured beads to match your colour scheme. Or, use tweezers to position twigs inside your bauble and glue gun a tiny robin made from a pom pom to one of the branches to create a mini winter scene. These are DIY Christmas decorations that look anything but home made! Be careful with glass though – especially if you’re crafting with the kids.
What you’ll need:
Clear, plain glass fillable baubles – as many as you need.
Fillings of your choice – try beads, wood chippings and feathers
A hot glue gun
Twig Trees
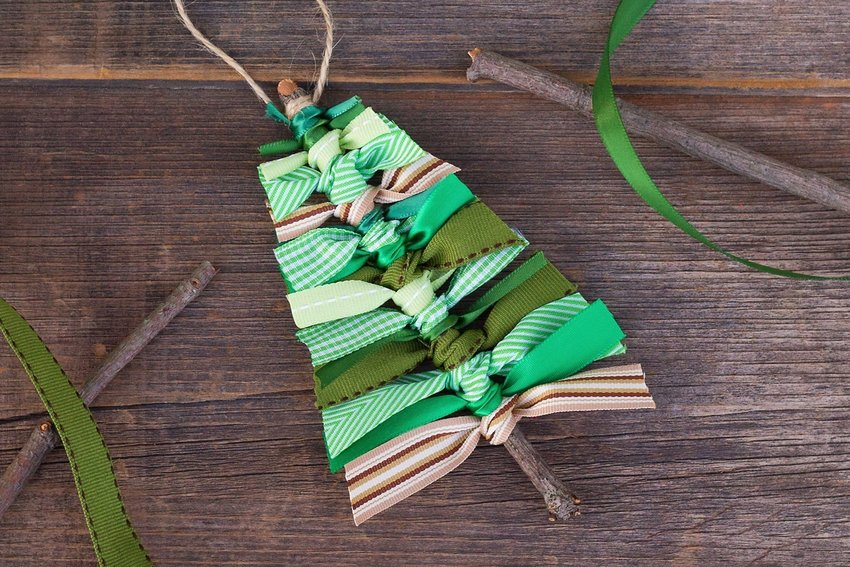
Image courtesy of: https://www.firefliesandmudpies.com
We think these “twig tree” DIY Christmas decorations look just as good as any decorations you could buy from a shop. They’re so simple, too – just scraps of ribbon tied around a twig! Wide ribbons will give you the best coverage. Don’t worry about the length of your ribbons until you’ve tied them all – you can trim them into your desired tree shape. If your ribbon is the kind that frays, carefully melt the ends with a match to keep it in one piece. You can even top your tree with a little felt star or a button!
What you’ll need
A selection of twigs – the length doesn’t matter much, as long as they’re reasonably straight
Ribbon scraps – we suggest using thicker ribbon to get a bushy looking tree
String
A hot glue gun
Optional: tree toppings like buttons or stars
Paper Ball Ornaments
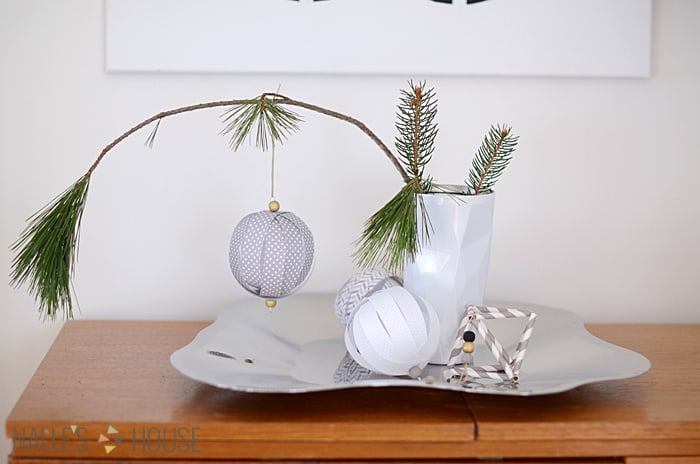
Image courtesy of http://www.nalleshouse.com/
These paper balls by Nalles House are inspired by Nordic design, but yours don’t need to be. They look insanely high-end, but are incredibly simple to make – just strips of paper formed into a ball around some wire.
What you’ll need (for one ornament)
Six strips of paper or card – we recommend card as it’s a bit more robust – each about 1.5cm wide and 25cm long
A piece of wire around 15cm long
Two beads
Ribbon or string
How to make it
To start, twist one end of your wire to make a loop, and thread one of your beads onto the wire
Poke the wire through the paper to make small holes at either end and in the middle of each strip. It’s important they’re all in the same place so mark where you want your holes to go before you poke the wire through!
Stack your strips of paper together, pattern side down, and thread them onto the wire through the middle hole you made with the bead and loop underneath. Fan them out evenly. You may want to dab a spot of glue onto the top of your stack of strips to help keep them in place.
Take the ends of the strip of paper on the bottom of the stack and thread each end onto the other end of the wire using the holes you poked earlier. Glue the ring together to help keep its shape
Work your way up your stack of paper, adjusting the positions of the rings you make as you go so they’re evenly spaced.
When you’ve made your last ring and the glue has dried, add your other bead to the wire and twist the end of the wire into a loop, like you have on the bottom.
Tie string or ribbon through one of the wire loops to hang your ornament!
Read more: What DIY Christmas Gifts Can You Make For Teachers?
Pine Cone Owls
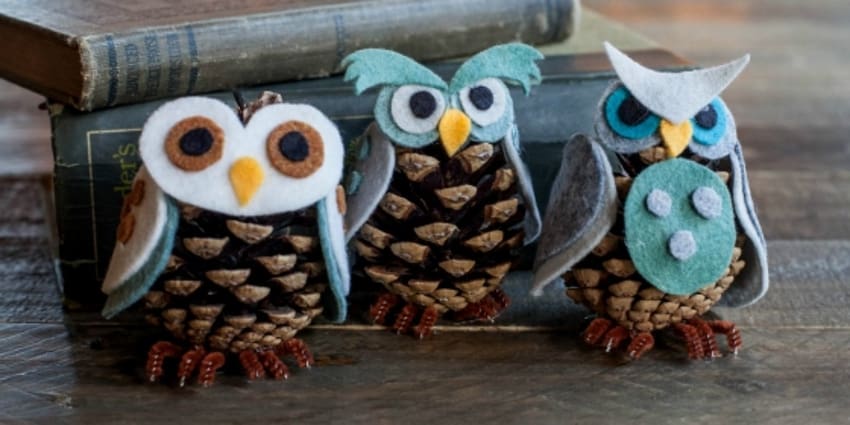
Image courtesy of https://liagriffith.com/
How cute are these little guys?! Pine cones have long made for popular Christmas decorations, but these owls by Lia Griffith take DIY Christmas decorations to a whole new level. With membership to the website, you can download templates to make pine cone owls, foxes, turkeys, elves, and all sorts of other creatures. If you’re a crafty sort, though, you could try making your own.
What you’ll need
Pine cones
Lots of felt
Pipe cleaners
A hot glue gun
Scissors
Washi Tape Trees
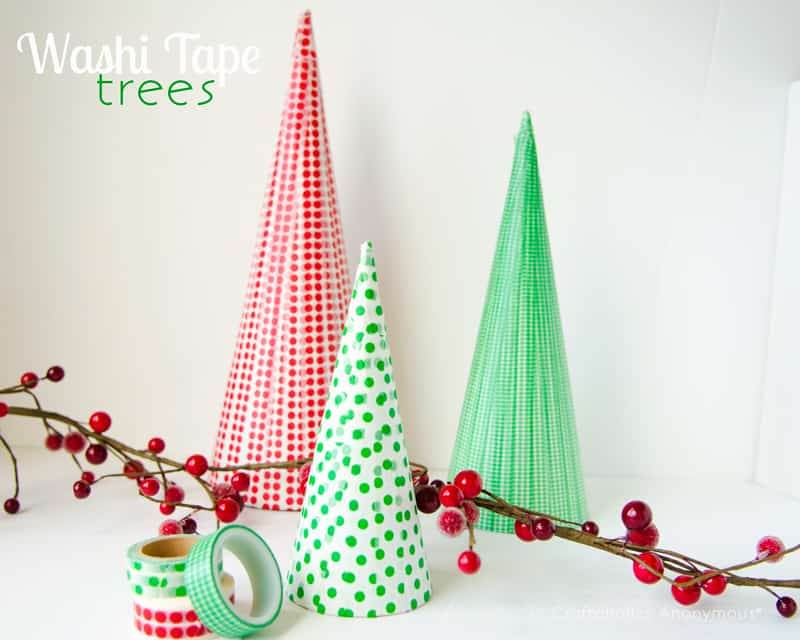
Image courtesy of https://www.iheartnaptime.net
Washi tape is a phenomenon that has swept over the crafting community. You can use it for so many things, from a fancy tape for gift wrapping to personalising virtually anything! These simple but beautiful washi tape trees make lovely table decorations. And, they’re so easy to make! All you need to do is take a cone shape – whether you buy one or make one – paint it white, and then start taping from top to bottom until the whole cone is covered. Cut or tear the ends of your tape at the bottom, and wrap the ends underneath and inside the cone. So festive!
What you’ll need
Washi tape – as many types and colours as you like!
A selection of papier mache cones, or you can make cone shapes from an empty cereal box
White paint (we suggest spray paint)
Scissors
We hope you have some festive crafting fun with these ideas!


