


I have fond childhood memories of Easter. Each year, we would decorate blown eggs, creating diorama scenes with them and usually based on a truly terrible egg pun. 1997 featured the ill-fated ship, Titeggic, for example. But, speaking to my long-suffering parents, it seems that what appeared to be a simple Easter craft project to young me was downright traumatic for them. Eggs would, devastatingly, break post-decoration. Not to mention, some of our creations required so many eggs, they were left somewhat out of puff! Rather than inflict that upon myself as an adult, here’s a selection of Easter craft projects that are simple enough for children, but fun enough for adults, too. And, no real eggs in sight!
Pom pom Easter creatures
When you think of Easter craft projects, pom poms may not be at the top of your list. But, the fluffy texture of pom poms lends itself exceptionally well to Easter creatures, and you don’t need a lot of equipment.
Making a basic pom pom
Making a basic pom pom is simple. All you need is wool, and lots of it, a big piece of cardboard, and scissors.
On the cardboard, trace a perfect circle using a saucer or another round object. Then, using a smaller object (like a teacup), trace another circle inside the first, leaving an even border all the way round. Cut around the larger circle, then cut a small wedge that allows you to also cut out the smaller circle, so you’re left with a “C” shape. Take this shape, and use it to trace another one on what’s left of your cardboard. Cut that one out, too, so you have two “C” shapes.
Stack your two cardboard “C” shapes one on top of the other, and start wrapping your wool around them. Make sure you leave long thread sticking out, as you’ll need this to tie off the ends later. Keep wrapping until your wool is at least an inch thick all the way round – this will make a nice, fluffy pom pom. Once you’re happy with your wrapping, tie off the ends.
Carefully slide your scissors into the wool so that you get through all the layers of wrapping, and start cutting! Once you’ve cut all the way round, you should have a pretty fluffy looking ball. Take a fresh, long strand of wool and slide it into the pom pom between the two cardboard “C”s that are holding it together. Tie a tight double knot, then slide the cardboard away. Fluff your pom pom up, and trim the wool tying it together in the middle. Et voila!
Pom pom Easter bunnies

Image courtesy of ikatbag.com
Make a large pom pom for the body and a smaller one for the head in colours of your choice. You can make quick bunny ears and a tail with some scraps of felt and glue them into place. Two black beads and a pink one make great eyes and nose. To make whiskers, thread some lengths of invisible thread through the hole of your pink bead, and use a bit of glue to hold everything in place. Then, glue your eyes and nose into place and you have yourself a bunny!
Pom pom Easter chick
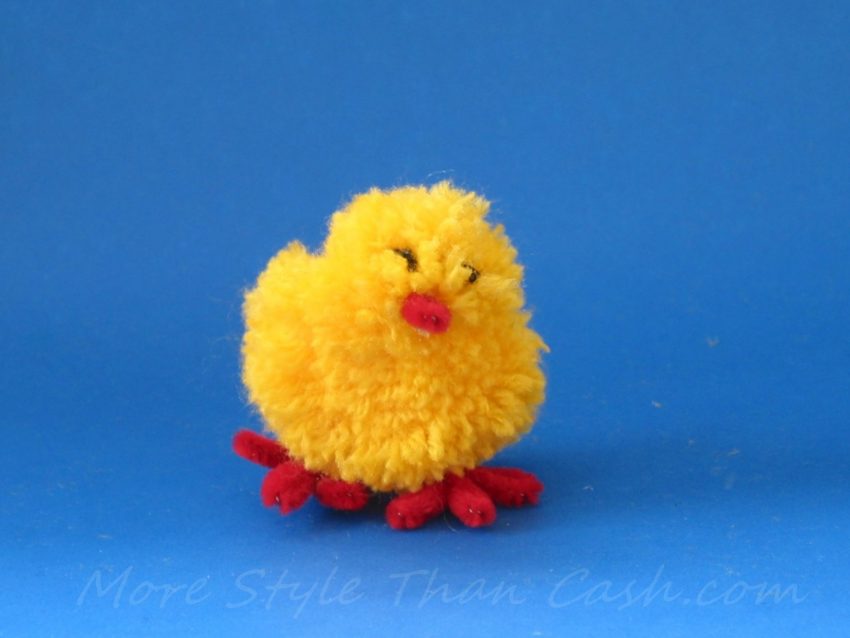
Image courtesy of morestylethancash.com
All you need for an Easter chick is a single pom pom! Trim into your pom pom to give it the shape of a head and body. Use pipecleaners to make feet and a beak, and a couple of black beads for eyes. If you want your chick to have wings, you can make them out of felt. Glue your beak, eyes and feet into place, leave it to dry, and your chick is complete!
Paint swatch Easter garland

Image courtesy of modernparentsmessykids.com
Who’d have thought you could put paint swatches to a use beyond deciding what colour to paint your walls? This Easter craft project uses them to make pretty Easter bunting to decorate your house with. All you need is a range of paint swatches in colours of your choice, a bit of paper cut into the shape of an egg or other Easter-y shape to use as a template, scissors and string.
Paint swatches normally have between four and six colours per swatch and are quite long and thin. You should be able to get 2-3 Easter shapes from each swatch. Cut each swatch so you have cards with two colours on each, trimming the top and bottom edges so the only white left is the strip that divides the two colours on your cards. On the back of each card, trace the outline of your Easter shape, then carefully cut it out with scissors. Punch two small holes in the top of each shape, either using a small hole punch or the traditional method of a sharp pencil through the card into a ball of bluetack. Then, thread each shape onto a length of string, and you’re done! All that’s left to do is to work out where to hang them…
Bunny bookmark Easter craft project
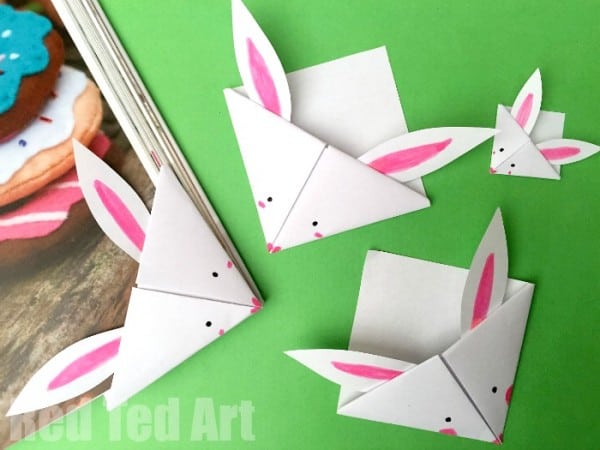
Image courtesy of Red Ted Art
Craft projects don’t get much simpler than something you can make with just a piece of paper, scissors and a Pritt stick. And, when it’s Easter-themed to boot? That’s a win-win. We’re making bunny bookmarks, but from the basic bookmark design you could make any creature – Easter or otherwise – you fancy! Why not try an Easter chick with some yellow paper?
To make an origami bunny bookmark, you’ll need a piece of A5 paper. You can make A5 paper from a sheet of regular A4 printer paper – just cut it in half! You’ll need to make this A5 paper into a square – easier said than done from a rectangle! A handy hack is to take one corner, and fold it diagonally across the sheet of paper until the straight edges align. It’ll look like a triangle with a rectangle on the bottom. Fold the rectangle up along the bottom edge of the triangle to make a crease, then cut it off. If you unfold the triangle, your paper will be a square!
Fold your square of paper back in half along the line you made earlier. Rotate it so the right angle of the triangle is pointing up, and the longest edge (or, the hypotenuse, to use its proper name) is facing you. Fold the lower right corner up to meet the top right-angled corner, then do the same for the left side so you have a diamond shape. Unfold these two so you have a triangle shape again.
Take the top sheet of the top (right-angled) corner of your triangle and fold it down, so the point touches the bottom edge and crease it. Fold the sides of the triangle you folded in earlier back up, and tuck them in behind the flap you’ve made. You’ll have a sort of pocket – an origami bookmark!
To turn the basic design into a bunny, make two ears out of the leftover paper you cut off earlier. Decorate them how you like, and glue them into place along the longest edge of the pocket. Decorate your bunny’s face with marker pens, and then slide your new book buddy onto the corner of your current read!
What Easter craft projects will you be doing this Easter holiday? Send your pictures to us on Facebook!