


From printed signs to delicate tree decorations and stunning wreaths; there are plenty of cheap homemade Christmas decorations that are easy to make, look shop bought and will really get you in the festive mood.
Get the whole family involved and recycle old household items that would usually go to waste. This will save yourself some cash too. Take time to craft your own personalised ornaments with these cheap Christmas decoration ideas.
Christmas bunting

You will need:
- Coloured card or a foam sheet to match your Christmas theme
- White chalkboard marker/white spray paint
- Letter stencils
- White ribbon
- Scissors
Create the perfect Christmas bunting to hang on your tree or along the fireplace as a garland. This is such an easy Christmas decoration to make at home because all you need are a few cheap materials, most of which you may have in the house already. With such an understated design to follow, you have the opportunity to personalise your bunting. You could paint on your family name or hang up a sweet message. Here’s how to create your own:
- Cut out your cards in your chosen shape, such as an arrow, triangle or star. For a stronger form that will last years to come, use foam sheets instead of card.
- Spell out your festive phrase in letter stencils on each piece of bunting and spray or draw away.
- Once it’s dry, cut out holes in the top and string ribbon through each letter to hang in your home.
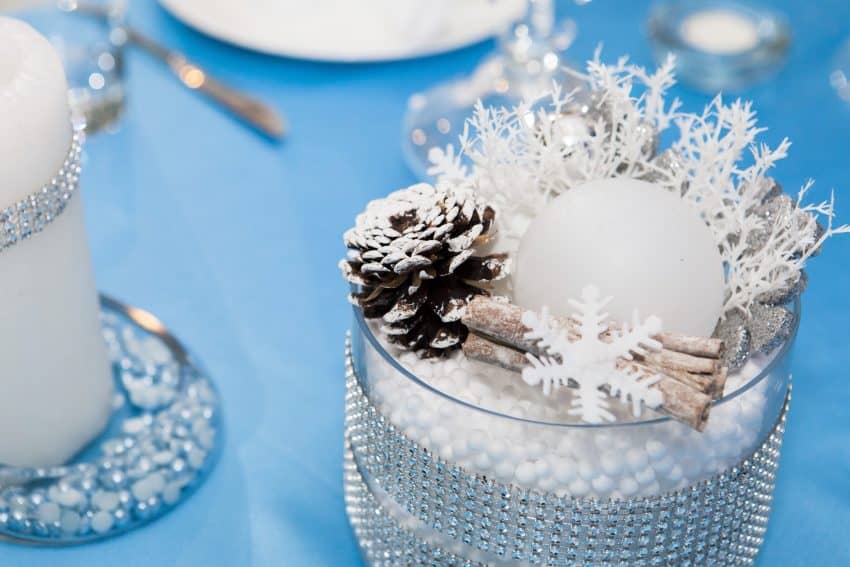
Table decorations
If you want to dress up the table and are looking for easy Christmas decorations to make yourself, these snowy centrepieces are perfect. You can make these as jazzy as you like and customise with things you can find around the house.
You will need:
- Candle holder or glass tumbler
- Polystyrene balls
- Moss
- Cinnamon sticks
- Snow spray
- Ribbon
Simply fill a glass tumbler or candle holder with polystyrene balls – like the kind you get from a beanbag – and add whatever embellishments you can find.
Spray a fragrant cinnamon stick, dry moss and pine cone with snow spray for a winter effect. Add in a spruce of tinsel or sprinkle confetti. You could cut snowflakes or tree shapes out of felt and place these at the back of the glass. Don’t forget to wrap colourful ribbon or add gems around the glass for added wow factor. Plus, the great thing about these easy Christmas DIYs is you can re-use the glass for something else after the Christmas season is over.
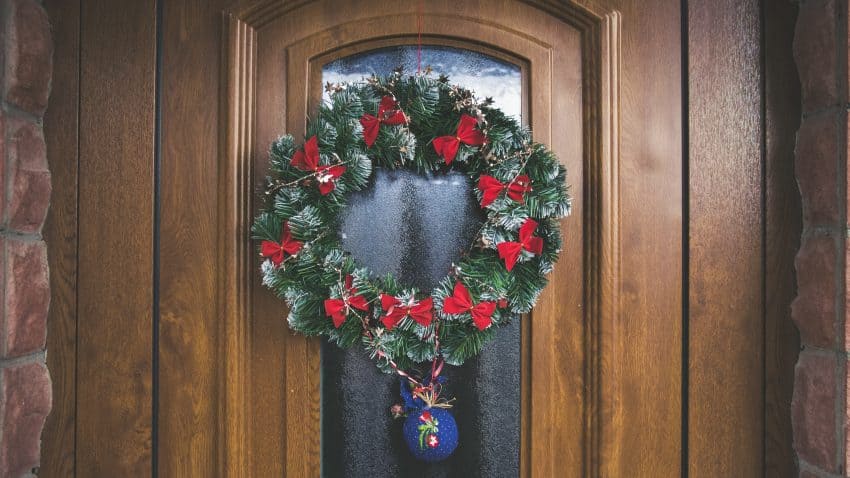
Christmas wreath
Decorating for Christmas on a budget can seem daunting, but there’s one thing you won’t have to miss out on creating. Wreath making is increasingly popular, but you don’t have to attend an expensive workshop to create an artistic wreath. It’s easy to make cheap DIY outdoor Christmas decorations or indoor garlands from twigs and branches you can find in the woods.
You will need:
- Evergreen foliage, such as spruce, holly, ivy or bay
- A wreath form
- Bells or bows to decorate
- Paddle wire
Create your homemade wreath using a simple wreath form, which is made from metal and can be picked up from your local craft shop. Or, if you want your wreath to be totally natural, you can use flexible branches, such as those from a willow, that can be twisted together into a ring. Use pliable paddle wire to attach your moss or foliage. Try not to cut the wire until the very end because it’s easier to fasten your decoration with one continuous wire string. Next, follow these instructions to build up your wreath:
- Using your branches, berries and foliage, create bundles of similar sizes, with the large leaves at the back.
- Attach the bundles to the wreath by wrapping a wire around the bundle tightly. It’s best to loop multiple times to make sure every branch is secure.
- Move on to fastening your next bundle and make sure you cover up the previous wire.
- Follow this fan pattern all the way around your frame.
- To finish your wreath, simply tie off the wire, making sure it’s well concealed. This is where you can add a bow, bells or extra decorations before hanging proudly on your front door.
Pinecone centrepiece

You will need:
- Pinecones
- Paint (for decorating)
- Glitter/fake snow (for decorating)
If you’re unsure how to decorate your home for Christmas on a budget, go into a forest or wooded area and look for fallen pine cones to make this festive decoration. But, as these are straight from the forest floor, you’ll need to clean them properly first.
How to clean pinecones
- Soak the pine cones in water and white vinegar. Pinecone petals close up when they’ve been in the water for a long time.
- After cleaning, bake the cones in the oven for at least 30 minutes at around 200 degrees to help kill off any bacteria living on the cones and to open the petals back up.
How to decorate pine cones
To decorate the cones, roll their edges in paint and glitter or use spray paint to turn these pretty cones into festive treats. A ruby red, gold or silver will look fantastic. If you don’t have paint you can also use coloured nail varnish and leave to dry.
If you’re creating a winter scene, dust the pine cones in snow spray or talcum powder and set with hairspray. Sprayed cones are great to accompany a wreath or to pile up in a bowl as a table centrepiece.
Snowman tree shape

You will need:
- Fabric
- Needle and thread
- String
- Cotton wool
- Buttons, pens and a ribbon for decorating
Christmas tree decorations are one of the easiest Christmas decorations to make. They’re also, arguably, the most rewarding as year on year you could make something new and look back on your creations over time. Surprisingly, these delicate and stylish tree ornaments are simple to assemble. All you need is some leftover fabric, which you could recycle from old cloth or clothing. Here’s how to create your own:
- Cut out your festive snowman shape twice, one for the front and one for the back. It’s easier to decorate the snowman at this stage before you sew it together.
- You can attach buttons, a ribbon scarf and paint on a face and top hat.
- Once you’re happy with the decoration, run a blanket stitch around the two fabrics, joining them together. However, before they’ve fully joined, stuff cotton wool inside the decoration until you’re happy with the padding.
- Seal the stitching shut and add a simple loop of string into its top hat so it’s ready to hang on your tree.
Enjoy creating these cheap DIY Christmas decorations and check out our other festive DIY treats!