


We’re increasingly told that re-using plastic bottles as water bottles is bad for our health as the plastic harbors bacteria and leaks chemicals. But, if you only use each plastic bottle you acquire once, then you’ll have a lot of plastic to go in the recycling – or worse, the bin. Fortunately, plastic bottles are quite versatile things. If you get creative, you can put them to a number of alternative uses to keep them out of the rubbish, for a while at least. One quick and simple way to recycle, or even upcycle a plastic bottle, is by turning it into a gift box!
Transparent gift boxes make a stylish and unusual way to present a number of gifts, from wedding and party favours. Coloured boxes, particularly green, are great for small Christmas gifts and could even be used as an alternative to Christmas crackers! Find out how to make a simple plastic bottle gift box by reading on…
What you’ll need
- Two plastic bottles that are the same size and colour, without lids
- Scissors
- A ruler
- Ribbon
- Tape
- A craft or sharp, small knife
How to make a gift box from a plastic bottle
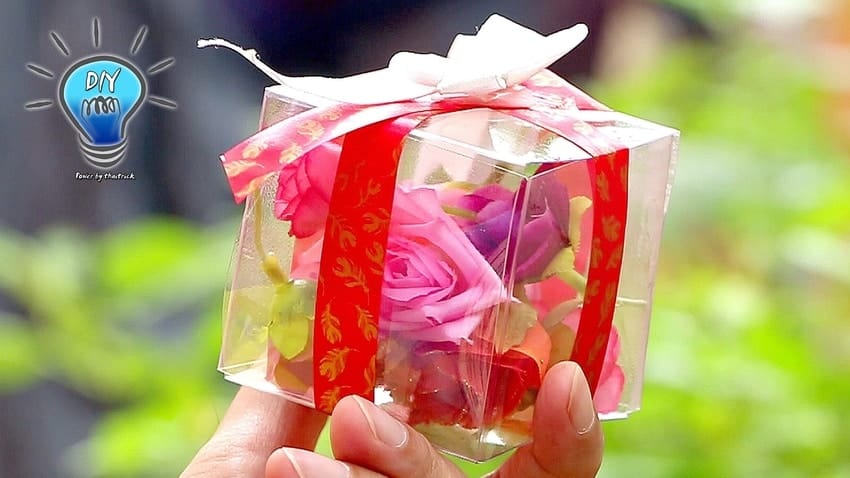
Courtesy of diywas.com
Step 1: Cut through your plastic bottles one at a time so you have two matching cylinders – cut below the neck and above the base, ideally so the sides are straight. It’s important that they’re identical. If one is bigger than the other, measure the smaller and trim the larger to match
Step 2: Flatten the sides of your cylinders to make them into flat rectangle shapes. If you can sandwich them between two heavy books for a couple of hours to help them stop bouncing back, then that’s a bonus
Step 3: If the long edges are uneven from where you cut the bottles in the first place, trim them so all your edges are straight
Step 4: Pinch the centre of your flat rectangle, so that you can flatten it out the other way. When you open it back out, it should be a perfect square as you look at it from above
Step 5: As your square stands up, measure the vertical sides (the ones that go down to the surface you’re working on) and the sides of your square. If the vertical sides are longer than the square sides, then you’ll need to trim them. Do this by measuring the sides of the square shape, then flatten it back into a rectangle and make a mark on the short side that’s the same length as a square side. Do this on both short sides, draw a straight line between them, and trim with your scissors.
Related: 4 DIY gift ideas to say thank you to your favourite teacher
Step 6: Now you have two matching square tube shapes, turn one of them on its side so the flat plastic surface is facing up at you, and slide them together. They should fit together perfectly to make a cube!
Step 7: Take them back apart, and fill the square tube that’s on its side with whatever you want. You can’t go wrong with chocolate (just saying), but flowers and cupcakes are great, too.
Step 8: Slide the square together again and tape the edges where the two pieces join so they don’t come apart and cause you to lose your gift in transit!
Step 9: Finish off your plastic bottle gift box with a ribbon or decorations of your choice!
Do you upcycle your plastic bottles into something more exciting? Let us know how you use them in the comments!