


As pet owners, one of our constant battles is trying to get our furry friends to steer clear of people food that isn’t always good for them. We’ve all had to deal with the consequences at some time or another, and they aren’t pretty! But, how can you blame them for wanting our food? After all, it looks – and smells – so much better than theirs!
Making special homemade treats for your pets will not only keep them away from the people food, but will be kinder on your budget than shop-bought treats as many of them are made from staple cupboard ingredients. Check out some of these great, simple recipes:
Tuna and catnip kitty croutons
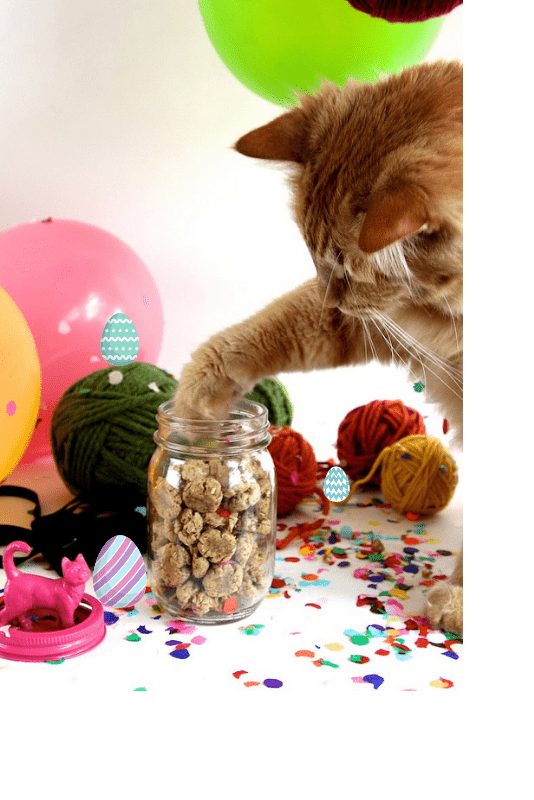
I grew up with a cat who adored toast. Whenever I was eating, he’d wait until I was just about to crunch, and steal a bite from the other side! I think he liked the crunchiness of it, as he also particularly enjoyed rice cakes, Mini Cheddars and Rib ‘n’ Saucy Nik Naks (remember those?!). He’d even steal crisps from the bag if we let him near enough. If being a fan of crunchy food is a feline peculiarity, then these kitty croutons by Joy the Baker should go down a treat.
What you’ll need
A can of tuna in water, drained
1 cup of oat flour (if you can’t get hold of this, grind oats in a food processor until they form a fine powder)
A large egg
1 tablespoon of olive oil
1 tablespoon of dried catnip
How to make them
Pre-heat your oven to 180 degrees celcius.
Line a baking tray with greaseproof paper and set aside for now.
In a food processor, blend together the tuna, oat flour, egg, olive oil and catnip until smooth. You should be left with a thick doughy mixture. It shouldn’t be too sticky.
Take a teaspoon at a time of your dough, break it in half, and roll each half into a ball. They should be a perfect cat-sized mouthful.
Place your balls on your baking tray as you go. Use a skewer to press a cross shape across each ball, which should also flatten them out a bit.
Bake your cat treats for 10-12 minutes until they’re dry on top and a little bit brown.
Allow your homemade treats to cool completely before giving them to your catty companion, then refridgerate them in an airtight container for up to 7 days.
Leftovers trail mix for dogs
We all know a dog who’s stolen a whole joint of meat that wasn’t meant for them. And the thing is, they’d probably get a taste of it anyway if they could just be more patient! Combining leftover meat and veggies into this doggy trail mix by Cesar Millan makes for a perfect after-walk treat.
What you’ll need
Leftover meat – if it’s been seasoned, be sure to rinse off any flavouring as your pup might not enjoy it as much as you did!
Potatoes
Vegetables (but not onions – they’re poisonous to dogs!)
Fruit (but not grapes or raisins – they’re poisonous too!)
How to make it
Pre-heat your oven to 200 degrees celcius.
Cut all your ingredients into small pieces, about a centimetre thick. This should be perfect dog bite-size!
Lay your pieces out on a lined baking tray, and spritz them lightly with cooking spray.
Bake in the oven until the pieces have dried out, but not burned.
Related: 6 brilliantly cheap and easy ways to keep your home clean when you have pets
Bunny rabbit treats
Rabbits need to keep up quite a strict diet to stay happy and healthy for their whole lives. For example, they wouldn’t naturally get their paws on much fruit in the wild, so it’s best not to give it to them at home either. But that doesn’t mean treats are off the table. These homemade treats from Genius Kitchen should be given in moderation – although of course that’s the whole point of a treat!
What you’ll need
1 small carrot, pureed
½ a banana, mashed until very creamy
1 tablespoon of honey
¼ cut of rabbit pellets, ground to a powder
¼ oats, ground to a powder
How to make them
Pre-heat your oven to 200 degrees celcius.
In a food processor, mix the carrot, mashed banana and honey. Add the ground pellets and oats and mix until fully blended.
Knead the dough in your hands for a couple of minutes – expect it to be pretty sticky.
Place your ball of dough between two pieces of greaseproof paper and roll it until it’s about 2mm thick.
Score your sheet of dough with a large knife in cross shapes, so you have diamond-shaped tiles approximately 2cm from top to bottom. Don’t separate them now – scoring them will make them easier to break apart when they’re cooked.
Transfer the greaseproof paper and dough onto a baking tray and bake your bunny treats for 30-40 minutes. They should be brown, but not burnt.
Turn off the oven, and leave the baking tray in there for another hour to help the treats dry out and turn crispy.
Remove from the oven and cool completely before breaking each diamond apart and giving to your bunny.
Store your homemade treats in a re-sealable bag in the fridge. Your bunny shouldn’t have more than one a day.
Gluten free, vegan dog treats
If your pup has specific dietary requirements, or you want them to share yours, then look no further. You can add to this recipe for homemade treats from The Plant Philosophy depending on what your doggy friend needs. Add fresh mint for less doggy breath, flax seeds for a shiny coat, and chia seeds to up the protein in the treats.
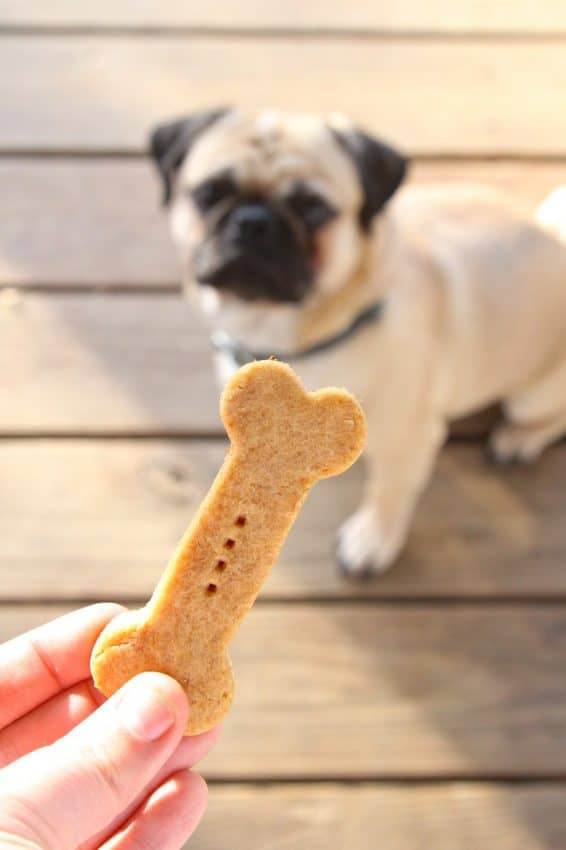
Image credit: The Plant Philosophy
What you’ll need
1 cup of oat or rice flour
2 ripe bananas, mashed
¼ cup of smooth, unsweetened peanut butter
A cookie cutter – if you’re feeling particularly canine, you can buy bone shaped cutters, but any will do!
How to make them
Pre-heat your oven to 200 degrees celcius
Peel your bananas and mash or blend them in a food processor with the peanut butter until smooth.
Pour in the flour bit at a time, mixing until evenly and fully combined.
Use your hands to roll the dough into a solid ball, then chill it in the fridge for 20 minutes to help it firm up. The dough should be slightly sticky but firm, similar to a cookie dough.
Place the dough between two pieces of greaseproof paper and roll out until it’s about 1cm thick. Use your cookie cutter to cut out shapes as desired, gathering together dough and re-rolling it out until you can’t get any more out of it
Transfer your canine cookies to a baking tray lined with greaseproof paper. Use a fork to poke holes in the centre of each cookie – this will allow steam to escape and make for a crunchier doggy biscuit.
Bake in the oven for 30-35 minutes.
Cool completely before giving your homemade treats to your furry friend. As a side note, they’re also people-friendly so you can try them too!
We hope these treats get a round of ap-paw-se from your furry friends!